Ready to supercharge your boutique with smarter email and SMS marketing? Let’s get SellSavvy hooked up to your Shopify store!
It only takes a few clicks, and we’ll walk you through each step with screenshots to guide you. You'll be tracking shoppers and automating like a pro in no time.
Step 1: Get Your Shopify Store URL
Before you can get started, we'll need to know your Shopify URL. If you haven't gotten it already, we have an article here with instructions on what to do.
Once you have the Shopify URL, please provide it to your SellSavvy onboarding specialist.
Step 2: Install the SellSavvy App
Next - it's time to install the SellSavvy app! Once you have received the app link from your onboarding specialist, you'll want to follow these steps:
- Click the SellSavvy install link provided to you.
- You'll see an "Install App" prompt in your Shopify app. Click the "Install" button
- Once it is installed, you'll see the SellSavvy login screen embedded in your Shopify store. Simply log in with your SellSavvy email address and password.

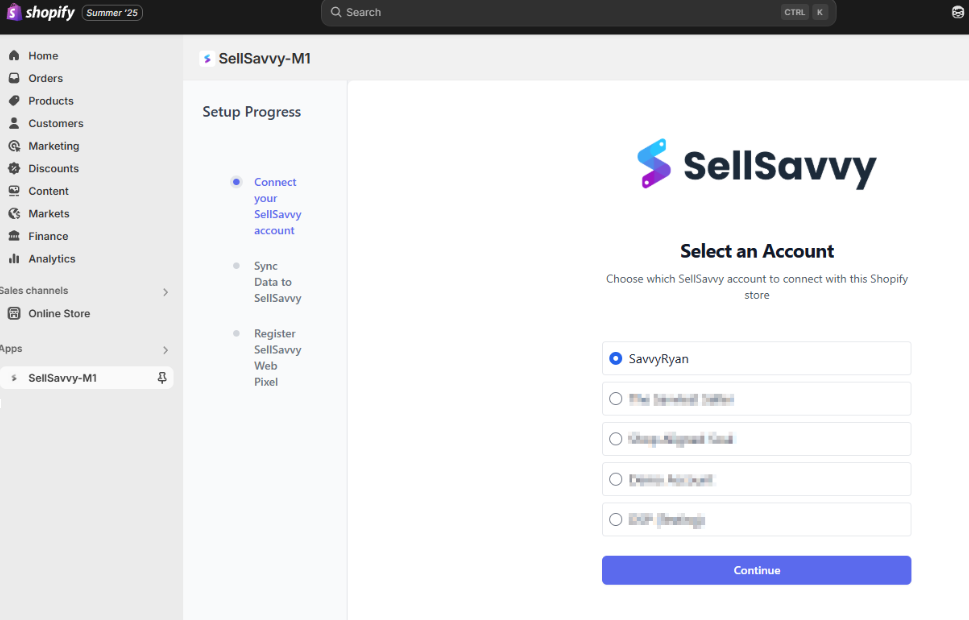
- If you have more than one SellSavvy account, you'll next be prompted to select which one should be tied to this Shopify app.
- Finally - click on the button to Register Pixel:


That's it!
Your Shopify store is now tied to your SellSavvy account! Let your onboarding specialist know that you're all done, and you'll be up and running with us in no time.
Was this article helpful?
That’s Great!
Thank you for your feedback
Sorry! We couldn't be helpful
Thank you for your feedback
Feedback sent
We appreciate your effort and will try to fix the article
